
Orientation by 1 Point
To access this screen
-
Run the plane-by-one-point ("1") command (quick key "1") and digitize a point in a 3D window.
-
Run the view-by-one-point ("v1") command (quick keys "v1") and digitize a point.
-
View ribbon >> Sections >> 1 Point and digitize a point.
Use the Orientation by 1 Point screen to define the orientation of a 3D window section definition or view direction using 1 point and specifying an alignment option.
Note: Plane commands adjust the current 3D window section definition for digitizing and design, whilst view commands simply orient the camera in the active 3D window. These commands are also available in other tasks and on other screens, such as the Create Vein Surface screen, for example.
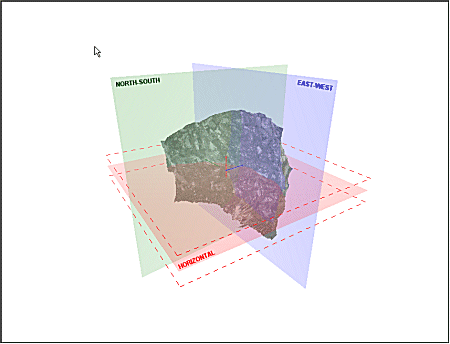
Section by 1 Point
A Section Definition is the term given to a series of parameters that precisely define a 2D plane in space. This facility exists within the 3D window to allow reference planes to be displayed, providing a basis for indicating particular aspects of your virtual scene, or to be used as a 'canvas' upon which to digitize strings for the purpose of texture alignment, mobile object simulations.
In this scenario, you are defining the plane used in the 3D window for design and view clipping (among other things). You can also use this screen to automatically orient the view to the new section definition afterwards, if you wish.
For a command overview and activity steps, see plane-by-one-point ("1").
After creation, the defined section is added to the end of the list of section objects in the Sections folder of the Sheets or Project Data control bar.
View by 1 Point
In this scenario, you are adjusting the view of your 3D data. The 3D Sections isn't changed, only the camera orients to a new view direction.
For a command overview and activity steps, see view-by-one-point ("v1").
Related topics and activities: